
Getting Started Guide
How to Use This Guide
Follow the numbered steps in this guide to get your company set up & stop stressing about payroll. If you want help at any point you easily Book an Appointment with an Onboarding Specialist!
1. Create your Company Profile
1.1 When you first log into & verify your account, you are prompted to create your company profile. So this step should already be complete.
1.2 To edit your company profile, make sure you’re Logged In. Click on the gear icon on the top right of the website & choose “Company Profile.” Here you can see & edit basic details like its address, phone number, CRA Payroll Number, Quebec Payroll Number (if applicable), etc. Input all applicable information and click SAVE.
2.1 Log In to your Payroll account. If this is the first time you’ve accessed your account after registering, you’ll see this automatic prompt to add your first employee:

If you skipped that “Notice” the first time, you can add an employee manually. Log In & click on “Employee” in the main menu. Then click “+Add Employee”. (See image below.)

Pro Tip: We recommend adding yourself as the first employee so you can see how easy it is. When you eventually add all your company’s employees, you’ll need their TD1 Forms & any pay history that exists in your old payroll service. But for right now if you’re just adding yourself, you should have easy access to everything you need.
2.2 On the “Personal Information” tab (pictured below), enter employee name & other details. Be sure to enter the employee’s correct Social Insurance Number (SIN) for the employee for tax reporting purposes. Near the bottom of the “Personal Information” tab, you will see “Employee Access”. Use the employee’s personal/permanent email address here & check the “Email Login Details” box so the employee is notified. This will automatically send the employee log in details for PayChequer, where payslips & tax slips can be accessed directly.

2.3 On the Payroll Details & Rules Tab (pictured below), enter the following information:
- Province of Employment
- Whether the employee is salaried or time-based
- Wage information (including Pay Rate, Pay Rate Unit, Pay Frequency, Standard Hours & Vacation)
Pro Tip: If you are unsure which Province of Employment to set your employee to please see HERE *Note this may be different from where the employee lives. Under “Tax Details”, complete the fields for …
- General Ledger Account Code
- TD1 Federal & TD1 Province Rates
- Exemption information related to Taxes, EI, WCB & CPP.
Pro Tip: If you want to group your employees’ wages by department, add their department’s General Ledger (GL) Code. If you don’t know what this means, it’s okay to leave the default number there.

2.7 Once you’ve added the info needed to the “Personal Information” and “Payroll Details and Rules” tabs, click “Save.” For now, ignore the tabs labelled “Benefits”, “Deductions”, “Financial YTD”, and “HR Details.” We’ll come back to them later. Continue to the next section of this Guide.
3. Watch a PayEvo Payroll Demo Video
3.1 PayEvo makes running payroll so simple that you can do it in less than 5 minutes! Watch this short video to see how easy your payroll will be once you have your company set up with PayEvo:
Pro-Tip: If you already know you want to sign up for Direct Deposit, you may want to skip ahead to Section 7 of this Guide, “Apply for Direct Deposit.” Applying for Direct Deposit has a 3-5 day approval process, so you may want to get the ball rolling on that in order to be able to run your first payroll with PayEvo on the date you desire.
4. Add your Remaining Employees
In Step 2 you added your company’s first employee. If you have more than one employee, you can add them now.
4.1 Log In to your Payroll account & click “Employee” in the main menu. Then click “+Add Employee”. (See image below.)
4.2 On the “Personal Information” tab (pictured below), enter employee name & other details. Make sure to enter the correct Social Insurance Number (SIN) for tax reporting purposes.
Under “Employee Access,” remember to enter the employee’s personal email address (not the employee’s company email address). Check the “Email Login Details” box so the employee is notified & can access payslips & tax slips through PayChequer.
4.3 On the “Payroll Details & Rules Tab” (pictured below), enter the following information:
- Province of Employment
- Whether the employee is salaried or time-based
- Wage information (including Pay Rate, Pay Rate Unit, Pay Frequency, Standard Hours & Vacation)
Pro Tip: If you are unsure which Province of Employment to set your employee to please see HERE *Note this may be different from where the employee lives. Under “Tax Details”, complete the fields for …
- General Ledger Account Code
- TD1 Federal & TD1 Province Rates
- Exemption information related to Taxes, EI, WCB & CPP.
If the employer is a new hire, have them fill out a TD1 form.
Click “Save” when done.
Pro Tip: If you want to group your employees’ wages by department, add their department’s General Ledger (GL) Code. If you don’t know what this means, it’s okay to leave the default number there.
4.4 If you are migrating your payroll from another system or converting from manual calculations, go to the “Financial YTD” tab. Here you can enter the employee’s historical payroll information.
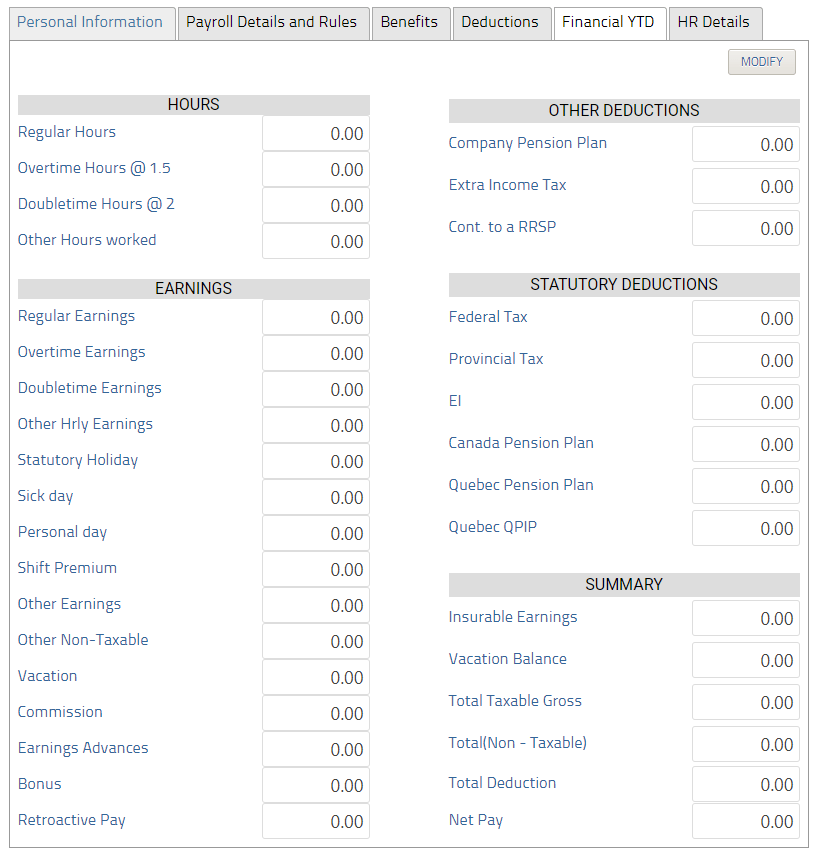
4.5 Remember that we skipped the “Financial YTD” tab for the first employee. Go back and enter that now.
Pro-Tip: If your previous provider did not break out Federal and Provincial Taxes please enter all data in Federal Tax box.
Pro-Tip: Consider having your previous payroll system send in an interim ROE for “changing payroll providers” to keep their EI history current with Service Canada.
Pro-Tip: Once you have entered YTD information for all of your employees go to REPORTS>YTD SUMMARY. Click to Create New Report, this will create an audit log of the data you have entered for easy reference if there are any questions in the future.
4.6 Repeat this Step for each employee until you’ve added all employees. Be sure to “Save” as you go.
5. Add Benefits and Deductions
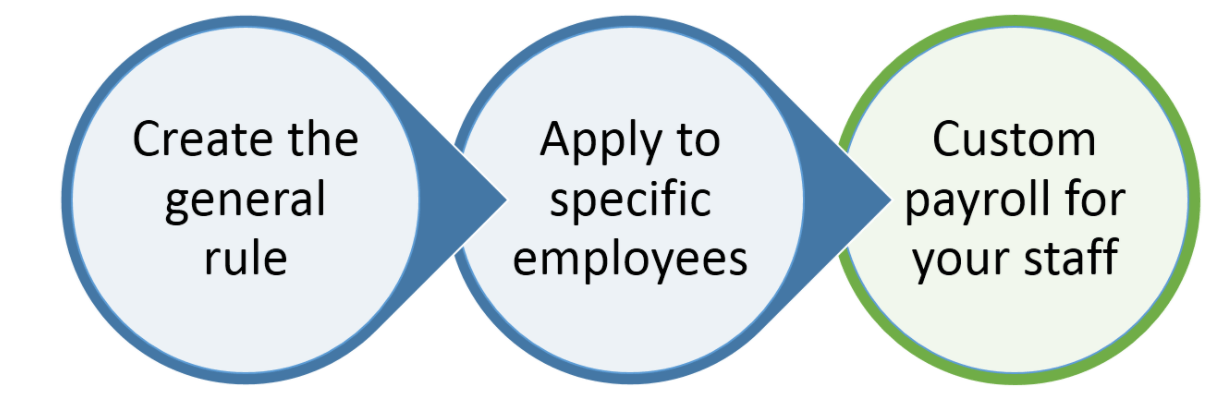
Benefits & Deductions are both added using PayEvo’s “Custom Pay Rules.” To add your company’s benefits and deductions, you’ll first create the Custom Pay Rule, and then apply it individually to relevant employees.
In Canada, benefits and deductions can be subject to CPP (Canada Pension Plan), EI (Employment Insurance), Federal Tax, and Provincial Tax. PayEvo Payroll lets you assign these to each deduction or benefit, giving you a lot of flexibility in how to calculate each custom benefit or deduction. To determine if a benefit or deduction is subject to taxes or withholding, please refer to the Canada Revenue Agency guide.
Pro-Tip: This is definitely an “advanced” feature and we’d recommend asking your accountant or tax official for advice on how changing benefit or deduction calculations might affect your business.
Pro-Tip: Benefits and Deductions can seem a little daunting, but our onboarding specialists are here to help! Simply book a call (LINK) and they’ll answer any questions you may have.
To start, make sure you’re familiar with these definitions, and how they are used in payroll calculation:
Gross Wage – Gross earnings are determined by adding together all the “monies” being paid to the employee (i.e., all taxable earnings such as regular salary, commissions, overtime pay, bonuses, vacation pay, pay in lieu of notice, etc.). plus any taxable allowances
and/or expense reimbursements such as a taxable car allowance or a taxable tuition reimbursement.
Taxable Gross – Gross taxable income is made up of all the taxable earnings, allowances and reimbursements of expenses being paid to the employee, plus the values or any taxable benefits.
Pensionable Earnings – Pensionable earnings are those earnings on which Canada Pension Plan/Québec Pension Plan contributions are calculated. Some companies also have pensionable earnings under their company plan. These earnings may be different from Canada Pension Plan/Québec Pension Plan pensionable earnings.
Insurable Earnings – Insurable earnings are those earnings which are considered insurable under the Employment Insurance Act. Generally, this means all remuneration with the exception of any benefit in kind.
5.1 – Create a Custom Benefit (with example):
For clarity, we’ll use an example as we explain how to add custom benefits. Let’s say your company wants to provide certain employees with a gym membership. Typically, a gym membership, if paid directly to the gym on the employee’s behalf, is subject to Federal and/or Provincial tax (they are taxable benefits), are subject to CPP (they are pensionable) and not subject to EI (not insurable). They are non-cash when paid directly to the gym. Ask your accountant or CRA for clarification on what your rule needs to be.
5.1.1 Click the gear icon in the top right, and select PAY RULES. Click on the BENEFITS tab and add a new rule.
5.1.2 Give your rule a name. This description will be used in the system to track amounts and will be used on your employee payslips to describe that line item in their pay. For our example benefit, we’ll choose “Gym Membership.”
5.1.3 Check ENABLED to turn the rule on and mark it as available to be added to the profiles of your employees.
5.1.4 GL Code– if you’d like to assign a custom general ledger code to this benefit, go ahead and enter the numbers. This should match the chart of accounts used in your general ledger and/or accounting program. If you assign a custom GL, the amounts here can be exported to your accounting program.
5.1.5 CPP– checking this box makes the amount subject to CPP calculations (increasing your employee’s pensionable earnings). Unchecking the box makes the benefit CPP-exempt (not subject to the CPP and not adding the amount to your employee’s pensionable earnings). For our “Gym Membership” example, this should be checked because we want the amount to be subject to CPP calculations.
5.1.6 EI– checking this box makes the amount subject to EI calculations (adding the amount to your employee’s insurable earnings). Unchecking the box makes the benefit EI-exempt (not subject to the EI calculations and not adding the amount to your employee’s insurable earnings). For our Gym Membership example, this should be unchecked so the benefit isn’t subject to EI calculations (as per the Canada Revenue Agency’s guidelines on non-cash taxable benefits).
5.1.7 Taxable (federal)– checking this box makes the amount subject to federal taxes (increasing the taxable gross of the employee). Unchecking the box will have the net effect of not adding the amount to the taxable gross of the employee (the amount will not be taxed federally). For our Gym Membership example, it should be checked.
5.1.8 Taxable (province)– checking this box makes the amount subject to provincial or territorial taxes. For our Gym Membership example, this should be checked.
5.1.9 Non Cash– check this box if this is a non-cash benefit. This means you do not give the cash to the employee directly, but to a third party on their behalf. When you create a non-cash benefit, if you DO NOT input a GL code it will NOT report on your General Ledger report. For our Gym Membership example, this box should be checked, since the benefit is paid directly to the gym, instead of to the employee.
5.9.10 T4 Box– if you would like to assign a custom code for tracking on your employee year end tax forms (T4) then enter it here.
5.1.11 Vacationable –
5.1.12 Click “Save” to save your custom benefit.
5.1.13 Here’s what your custom pay rule would look like for our Gym Membership example:
5.2 – Create a Custom Deduction (with example):
Now we’ll learn how to create a custom deduction, again using an example for clarity. Suppose we want to deduct premiums for an employee-paid life insurance policy (the employees are paying for it, which makes it a deduction). The amount we are deducting should come from the employees’ NET pay (i.e. after all tax calculations).
5.2.1 To set up the deduction, click the gear icon (IMAGE OF GEAR ICON) in the top right and select PAYROLL RULES. Click on the DEDUCTIONS tab and add a new rule.
5.2.2 Give your rule a name – this will show on the employees’ payslips. For our example, we’ll use, “Life Insurance Premium.”
5.2.3 Check ENABLED to turn the rule on and mark it as available to be added to the profiles of your employees.
5.2.4 GL Code– if you’d like to assign a custom general ledger code to this benefit, go ahead and enter the numbers. This should match the chart of accounts used in your general ledger and/or accounting program. If you assign a custom GL, the amounts here can be exported to your accounting program.
5.2.5 Reduce taxable gross– Checking this box will deduct the amount from the employee’s taxable gross. Unchecking this box will deduct the amount from the employee’s net pay. For our Life Insurance Premium example, we want the amount deducted from the employee’s net pay – so we will leave the box unchecked.
5.2.6 Here’s what your custom rule would look like for our Life Insurance Example:
Pro-Tip: Certain things, like Company RRSP Contributions may require both a Benefit pay rule, and a Deduction pay rule.
A company’s contributions to an RRSP plan are often considered a taxable benefit to the employee. In this case, it must be set up to ensure the proper amounts go into box 14 on the T4, but also that the taxes are deferred.
We can achieve this by first creating a custom Benefit pay rule to add the contribution to the pensionable/insurable/taxable gross. Then we create a custom Deduction pay rule to deduct that same amount from the employee and reduce their net taxable income.
For a more complete walkthrough of this, check out this article in the Help Centre (LINK).
Pro-Tip: Remember, you can always book a call (LINK) with one of our onboarding specialists if you need a hand!
5.3 Apply your Custom Benefits & Deductions to Employees
Once you’ve created all your custom Benefits & Deductions, you need to apply them to all relevant employees. To accomplish this, do the following:
5.3.1 On your Payroll account’s home page, click EMPLOYEES, then click the Edit button (IMAGE OF EDIT BUTTON) for the first person in your employee list.
5.3.2 Click on the Benefits Tab
5.3.2.1 Select the custom Benefit you’d like to add from the dropdown menu, then click the +ADD button.
5.3.2.2 It will now show up in the rules for the employee and you can enter an amount, either as a dollar or percentage (this can be different for each employee).
5.3.2.3 NOTE: This benefit is paid each time you do a payrun. Therefore you need to calculate the cost of the benefit PER PAYRUN. To do this, use this formula: (Annual cost of benefit) / (# of employee’s pay periods per year) = (cost per payrun)
5.3.3 Apply any other benefits you wish to add using the same method.
EXAMPLE: If you pay for an employee’s gym membership that costs $50/month, but the employee is paid biweekly (26 pay periods), you simply calculate:
($50 per month * 12 months = $600 annual cost) / 26 pay periods = $23.08 per pay run.
5.3.4 Once you’ve applied all Benefits for that employee, click on the Deductions Tab
5.3.4.1 Select the custom Deduction you’d like to add from the dropdown menu, then click the +ADD button.
5.3.4.2 It will now show up in the rules for the employee and you can enter an amount, either as a dollar or percentage (this can be different for each employee).
5.3.4.3 NOTE: Similar to the benefits, deductions are done each time there is a payrun. Therefore, you need to calculate the amount to be deducted PER PAYRUN using the same formula as above.
5.3.5 Once you’ve applied all desired Benefits and Deductions to an employee, make sure to hit SAVE before continuing on to the next employee!
5.3.6 Once you’ve applied your Benefits and Deductions to all your employees, proceed to the next Section of this Guide.
Employers can pay their employees in a few ways. We recommend the convenience of direct deposit over paper cheques & setup is easy. However, if you prefer to use cheques, you can skip this step & move on to the next.
6.1 Log In to your Payroll account & click the Direct Deposit “Sign Up” link on the main dashboard.
(IMAGE OF PAYROLL ACCOUNT HOMEPAGE WITH DIRECT DEPOSIT SIGN UP BUTTON HIGHLIGHTED AS IN CURRENT ARTICLE)
There is a one-time setup fee of $55 to apply for Direct Deposit. The signup is quite straightforward. You’ll just need a few documents to get through it:
Document must be in one of the following formats: .jpg, .jpeg, .png, .gif, .tiff, .bmp, .svg, .pdf.
Business Registration:
- Incorporation documents
- Business registration documents
Bank Verification
- A void cheque or
- Image of a processed and cleared cheque or
- Letter from your branch manager
Identification
- Valid Canadian driver’s license
- Valid Canadian Passport
- Valid Canadian permanent resident card
6.2 Once your application is fully submitted, it will be processed within 5 business days. If we require any further information, we’ll be in touch. Once your application is approved, you will receive a notice via email that your account has been activated and you’ll be able to process electronic payments in your account.
6.3 Once you’ve submitted your application for Direct Deposit, move to the next step of this Guide
Frequently Asked Questions about Direct Deposit:
Why do I need to provide bank verification and identification for this service?
Since we are dealing directly with your bank account, we need to verify that you are the signing officer for the account and have the ability to delegate us to make payments from that account. This requires us to gather physical evidence (i.e. billing statements, incorporation papers and photo ID). All this information is used only to verify your identity and establish the e-Pay service. We treat this information as highly sensitive and private – and in accordance with our privacy policy, we will never sell or rent your private information to others.
Who can I pay with this service?
Payments may be made to any domestic Canadian dollar bank or credit union account (business or personal). In addition, remittance payments may be made to the Canada Revenue Agency and Revenu Québec.
If I change bank accounts, do I need to apply again?
Yes, a new application is necessary if you wish to add a new account or add any additional accounts to your profile.
Can I still process the occasional cheque in my account?
Yes, if your plan supports cheques, you can still issue the occasional cheque payment.
How are fees calculated for electronic payments?
For most plans there is a fee per transaction. For payroll payments, the debit and credits count as transactions. If you are paying 5 employees, the number of transactions would be 6 (one withdrawal from your corporate bank account and 5 payments to your employee bank accounts). For business payments, the fee is per business payment. If you were paying 5 vendors, the fee would be for 5 business payments. For remittance payments, the fee is per remittance collected (typically per pay run) for most plans. If you want to learn about our all inclusive plans please reach out to us and we are here to help.
What is my lead time for direct deposit?
Lead times will vary by Bank, Plan Type and Industry. Here’s a chart that breaks it down
5 day
ATB (219)
Cannabis industry
4 day
Scotiabank (002)
National Bank (006)
All other banks (if plan is Accountant Basic, Green, or Business Plan)
3 day
(if plan is B+ and Accountant Advanced / EVOLV)
All other banks not listed above
7. Integrate with Accountin Software (optional)
7.1 Integrating PayEvo Payroll with your favourite accounting software can save tons of time, and make things easier to track!
Simply click on the software you’d like to integrate below, and follow the directions to integrate your preferred software. Compatible Accounting Software
Once you’ve integrated with your desired software, proceed to the next Step.
8.1 By now you have added your employees, set up your custom benefits & deductions (if applicable), and applied for Direct Deposit (if desired). Now it’s time to Book an Appointment with an Onboarding Specialist & review what you’ve done.
8.2 On this call, one of our onboarding specialists or a member of our Customer Success Team will answer any last questions you have, and walk through a checklist to make sure you’ve set up everything you want before your first payroll.
The Checklist:
Have you…
- Completed your Company Profile, including bank info
- Added all your employees
- Applied your custom Benefits & Deductions to relevant employees
- Integrated your accounting/HR software
- Applied for Direct Deposit
- OTHER?
8.3 Once you’ve gone through this checklist with somebody from our team, proceed to the next & final Step.
Congratulations on making it to the end of this Guide! You’re now ready to run payroll!